Understanding the roof installation process is essential for every home renovation project. It helps homeowners budget, set timeframes, and process permits required for a new roof.
Local roofers can provide this information. However, homeowners must understand the basics of roof installation to set realistic expectations and select the right contractors.
What Does the Roof Installation Process Look Like?
The roof installation process depends on the initial roof and structural inspections. But in most cases, contractors follow these steps when installing a new roof:
Initial Roof Inspection
Inspections ensure your roof is free of structural damage. Underlying issues like penetrations, moisture damage, or storm damage could affect the integrity of the roof foundation.
Roofers will inspect flashings, vents, valleys, chimneys, gutters, and shingles. However, to find potential causes of underlying issues, roofers must remove the old roof and look at the decking.
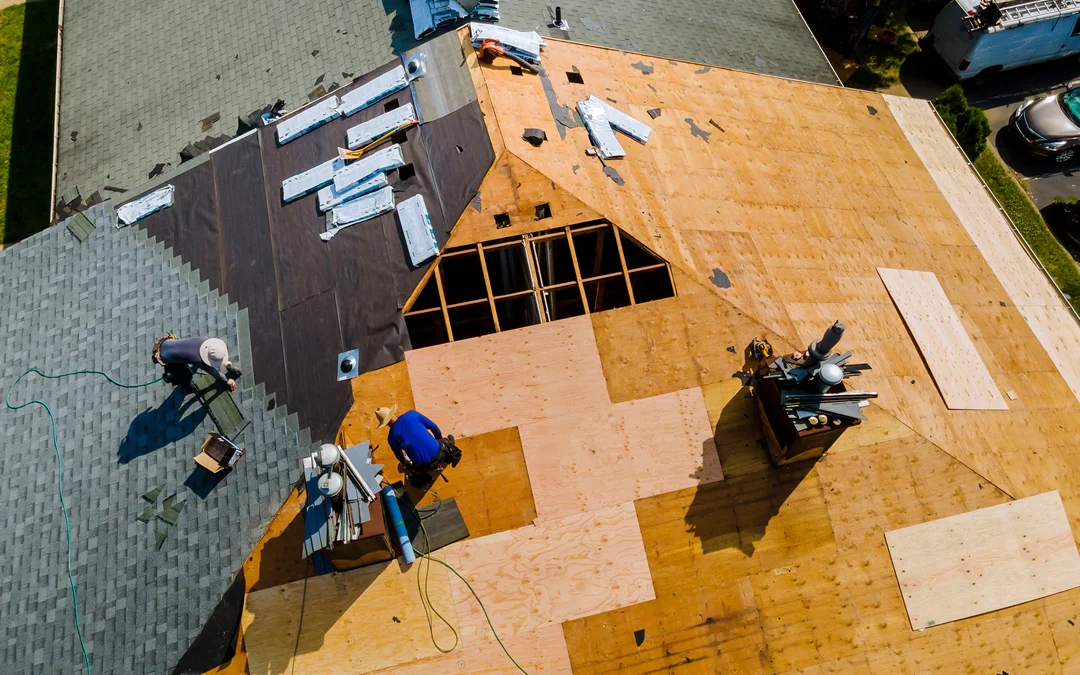
Removing Old Roof
Most residential homes have asphalt shingles. Roofers can easily remove them using a shingle fork, starting at the top and working down.
Metal roofs are removed with a pry bar. Its panels need to be removed by a drill. Then, roofers remove the ridge cap and fasteners until all metal roof panels are removed.
Inspecting Roof Decking
After removing the old roofing materials, roofers can access the roof deck, which is the structural support for shingles and other materials.
Roofers often look for signs of sheathing damage, moisture damage, mildew, mold, or rot. This determines whether extensive repairs are necessary before the new roof is installed.
Examining Flashing
Flashing is essential for redirecting water away from vital areas of your roof. These are typically made with galvanized steel and can be found around vents, chimneys, or skylights.
Roofers must determine if flashings are in good enough shape to be reused in the new roof installation. If not, then it must be replaced to prevent water penetration damage.
Installing Underlayment
Underlayment is your roof’s last line of defense. It’s the material that’s between your shingles and roof decking. It protects your roof’s framing and sheathing from water and rot damage.
To install underlayment, roofers do the following:
- Ensuring proper installation of drip edge
- Fasten the underlayment with cap nails starting from the roof’s edge
- Overlapping the underlayment about 6 inches after the first rows are installed to ensure protection along the seems
- Placing the final rows along the roof’s edge, dropping down and covering each side.
After fastening the underlayment, roofers must install the drip edge along the sides of your roof to prevent water from going under the underlayment.
Installing Drip Edge
The drip edge could be installed before or after the underlayment or other roofing materials depending on where it’s located on your roof.
Roofers install it before the underlayment if it’s found in the lower section of your roof and after if it’s on the side. When the drip edge and underlayment are installed, roofing materials are next.
Installing New Roofing Material
Whether clay, asphalt, or metal roofs, roofers install from bottom to top. Roofers often nail asphalt shingles through a tar strip to prevent exposing the nails when installation is finished.
If it’s a metal roof, panels must be installed with fasteners along the ridges. Water can pool and penetrate your roof when fasteners are placed along flat areas of your metal panels.
Debris Collection
Before committing to a roofing contractor company, ensure they include debris collection, clean-up, and disposal. The contractors must clean up old roofing materials, find stray nails, and properly dispose of debris.
Final Inspection
When the dust settles after the roof installation, a final inspection is done to ensure everything is properly installed. Contractors must check for defects to avoid warranty issues down the line.
Consider This When Installing a New Roof
Remember, the roof is only part of a system. You should also consider the following when you’re planning to install a new roof:
Warranty
When looking for a roofing contractor, try looking for one that provides a roofing workmanship warranty. This ensures that you’re protected against potential installation errors.
The roofing materials should also have a warranty. Most residential shingles have a 25-30 year warranty. There are also options for a 50-year or lifetime warranty coverage.
Plumbing and Vent Protection
Underlying issues can shorten your roof’s lifespan. One area often overlooked that causes mold and leaks is your plumbing and vent systems.
When installing a new roof, consider replacing the plumbing boot too. Most residential homes need plumbing boots if you have a modern plumbing system that requires vent roof pipes.
Bathroom Venting Caps
Proper airflow in your bathroom is essential in mitigating mold growth. Steam and moisture must be exhausted. Without proper ventilation, spores and fine dust spread, reducing air quality.
If the roof above your bathroom is replaced, consider replacing the venting caps even when you don’t have exhaust fans. This will future-proof your bathroom.
Protecting Your Attic
Many homeowners use their attics for storage. Before a new roof installation, ensure that your attic storage is removed. If you don’t have another storage space, cover it up.
There will always be a lot of debris and dust during a roof installation. You don’t want your items damaged or to require hours of cleaning.
Replacing Oriented Strand Board
Roofers might recommend an OSB replacement. If you decide to get them replaced, don’t skip on quality materials. They provide a lasting foundation for your roof and improve longevity.
Redoing Whole-Home Seal
Air sealing improves your home’s air quality, reduces humidity, and helps lower electricity costs. If you had this done before your new roof installation, it’s worth doing again. Check with your contractors if they can redo a whole-home seal after the roof replacement.
Investing in a New Roof
Installing a new roof is a big financial investment. You need to ensure that it’s done right. The exact roof installation process depends on the type of roof, size, height, and complexity.
- However, in most residential homes, the roof installation process includes:
- Initial roof inspections
- Removing old roofing materials
- Roof decking inspections
- Flashing examinations
- Installing underlayment, drip edge, and new materials
- Debris collection and final inspection
If you’re looking for a trusted, vetted, and experienced roofing company to install your roofs, look no further than Trenton Roofing. Schedule a free estimate today!

Alex Valentino – Vice President
Leading the way for the company’s second generation of family and employee ownership, Alex’s mission is to create lasting relationships built on trust and respect by providing uncompromising workmanship and unparalleled customer service. With a focus on safety and consumer education, Trenton Roofing strives to set the bar for the advancement of the roofing industry and the betterment of our local communities. When he is not working, Alex can be found traveling with his fiancée, watching football or playing a relaxing round of golf with his friends.
Recent Comments